Wednesday, 2 March 2011
ARP Con-Rod Bolts
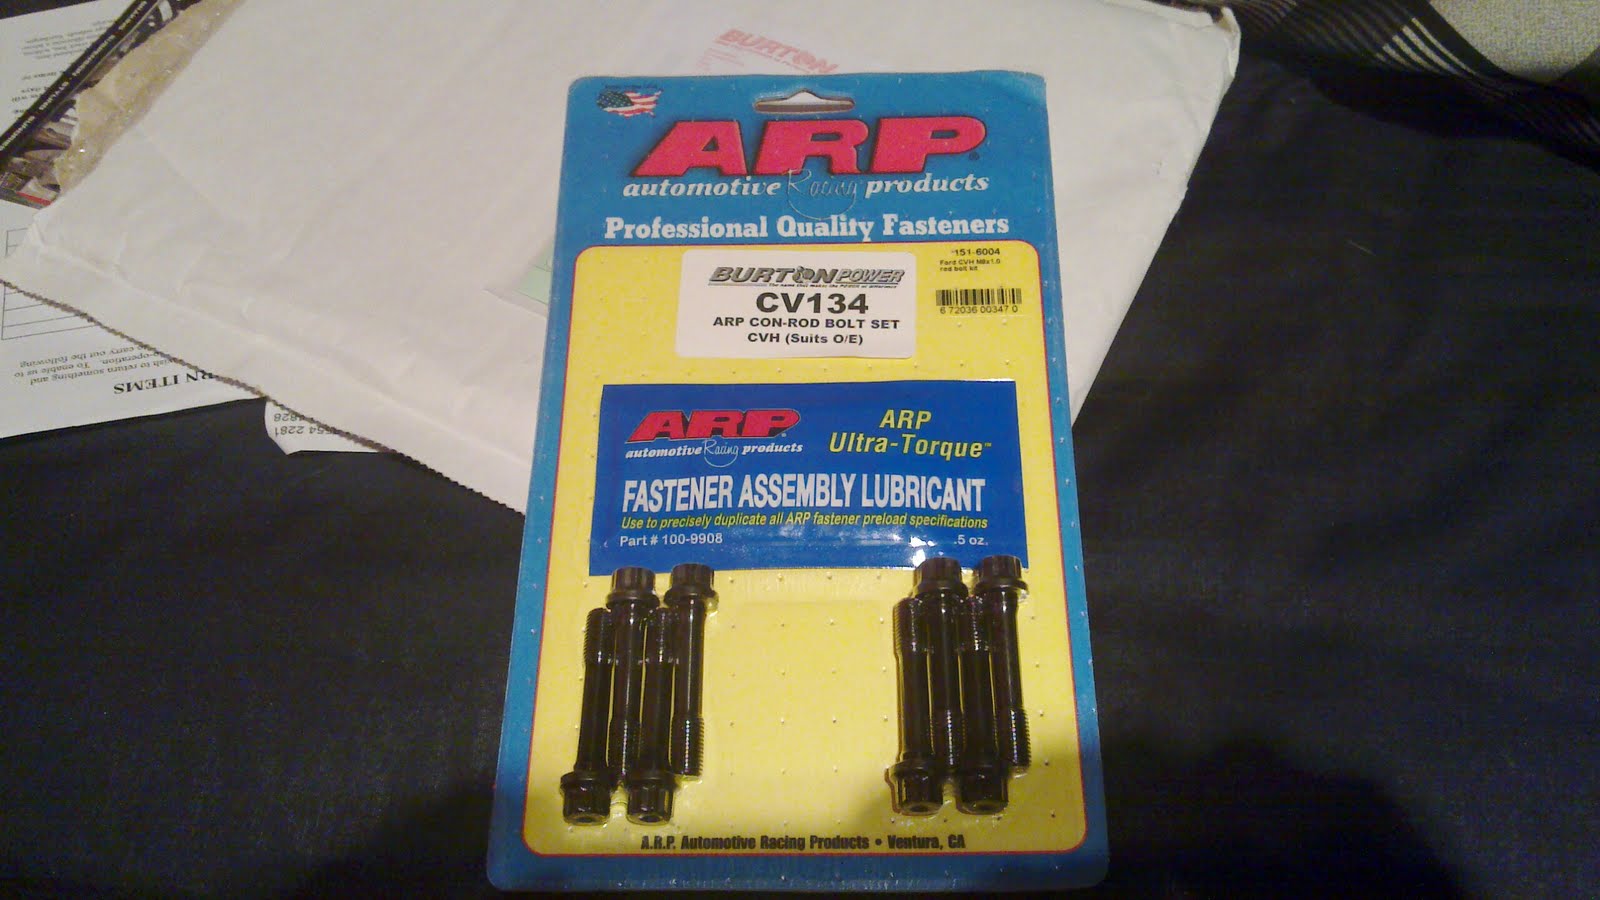
Just a little photo update, got a set of ARP Con Rod bolts for the engine build. Just making sure the pistons don't try and make a bid for freedom out the block :)

Saturday, 26 February 2011
Bottom end ready
Good evening.
Today Me and Wayne spent a few hours making more mess and making more progress.
We measured how much the piston protruded from the block deck at top dead centre. It was approximately 0.75mm so we removed that amount from all 4 pistons. This will give us our 7.68:1 C/R and concludes pretty much all the work that needed doing to the bottom end. All that's left is to assemble it with plenty of oil and then we can begin modifying the cylinder head to accept electronic fuel injection. Hopefully the bottom end will be assembled tomorrow morning and another small update will follow! for now here's the block setup with a DTI guage.

Sunday, 30 January 2011
Getting there,,,
Another couple of hours were spent at the workshop today to make the measurements required to the cylinder head to allow us to calculate the compression ratio. First of all Wayne machined a new angle into the exhaust ports, making a step from ~30° to the standard ~45° as opposed to the exhaust gases charging right into a 45° angle. This will just help everything flow and hopefully make the turbo more efficient. After this the outer edge of the combustion chamber is given a bit of vaseline and a squared piece of perspex with a tiny hole is placed on top. The vaseline is used to provide a seal so a liquid can be poured in with use of a burette, and thus we can measure the capacity of the chamber. The chambers turned out to hold 53cc and this figure was than used to calculate alng with the swept volume, the compression ratio with a flat piston. The end result was 7.68:1 which is pretty much ideal for our application.
Anyway, here is a photo taken today of Wayne making a mess, and making noise while blending in the valve and combustion chamber.

Next on the to do list is to find a suitable cam for the engine...
Anyway, here is a photo taken today of Wayne making a mess, and making noise while blending in the valve and combustion chamber.

Next on the to do list is to find a suitable cam for the engine...
Saturday, 22 January 2011
A brief, green and shiny update
Good evening all.
Today Me and my Brother spent a couple of hours dummy building the bottom end. A matter of putting the main bearings in with the crank and attaching a piston and rod to it so we can make accurate measurements to work out compression. Everything went together nicely and with a little oil everything moved smoothly. Next up we need to get the head to the workshop and measure that too. The pistons are +1.5mm so the overall capactiy will be 1659 - the additional torque over standard 1597 will be very welcome.

Today Me and my Brother spent a couple of hours dummy building the bottom end. A matter of putting the main bearings in with the crank and attaching a piston and rod to it so we can make accurate measurements to work out compression. Everything went together nicely and with a little oil everything moved smoothly. Next up we need to get the head to the workshop and measure that too. The pistons are +1.5mm so the overall capactiy will be 1659 - the additional torque over standard 1597 will be very welcome.

Wednesday, 13 October 2010
Small-ish update
Good evening all.
Again it's been a while since anything has happened to the project, but it's still alive. Main delay was my brother Wayne getting married and as a result him being incredibly busy. Unfortunately I don't know alot about this sort of thing so have had to sit tight and do what I can.
Tonight I finally got round to start stripping the new head I got a few updates back. I don't have a valve spring tool so the valves and springs are still in place but everything else has been removed. The head appears to have been rebuilt recently as there was fresh grease and most bolts were little more than hand tight.
All looks good so far and everything looks in good condition. The head will be gas flowed as soon as possible to help everything breathe. Hopefully I can get hold of the valve spring tool soon to get it completed and another task checked off!
A couple of pictures with the progress made. Fortunately it took about half an hour and was compeltely painless!


Friday, 13 August 2010
Painted Block
Another small update for y'all.
My brother very kindly gave the block a final rinse with a pressure washer and gave it a lick of paint in prep for dummy building.
It shouldn't be too long until it all starts going back together again and testing for compression ratio etc.
I'll let the pic do the rest of the talking. It's defintely a bright colour, but in the (unlikely) event of an oil leak, it will make it easier to trace. I only know the colour as "Brunswick Green".

Monday, 12 July 2010
Shiny, Dark Wheels.
Another small update. This one is for the aesthetics of the car..
My Dad has very kindly asissted me in spraying the wheels I got a few weeks ago. I decided on Matte black but he also sprayed one in Gloss to compare. I defintely preferred Matte and I'm sure you can see why...

My Dad has very kindly asissted me in spraying the wheels I got a few weeks ago. I decided on Matte black but he also sprayed one in Gloss to compare. I defintely preferred Matte and I'm sure you can see why...

Subscribe to:
Comments (Atom)